Looking For Something else?
Hoka Bondi 9 Review
Hoka Bondi 9 Review
Parts ❶ Audience Verdict❷ Who Should Buy❸ Who Should Not Buy❹ Comparison Table❺ Spece (Brand) other sections...
Nike Savaleos image for this blog post
Nike Savaleos
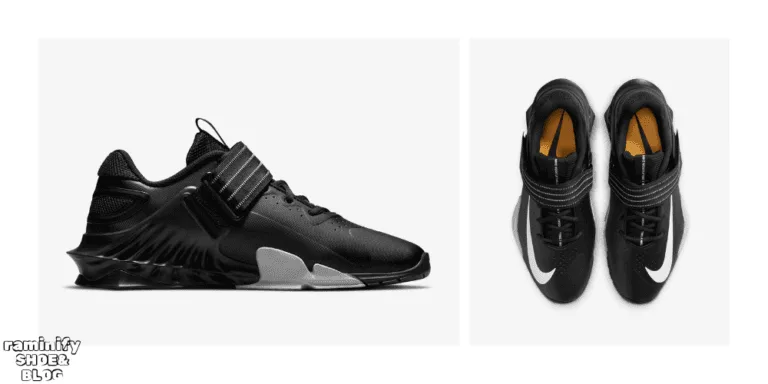
BOLG ⇨ SHOE REVIEWS nike savaleos reviews If you asked me to give a simple and concise review...
Hoka Gaviota 5 review design image
Hoka Gaviota 5 Review
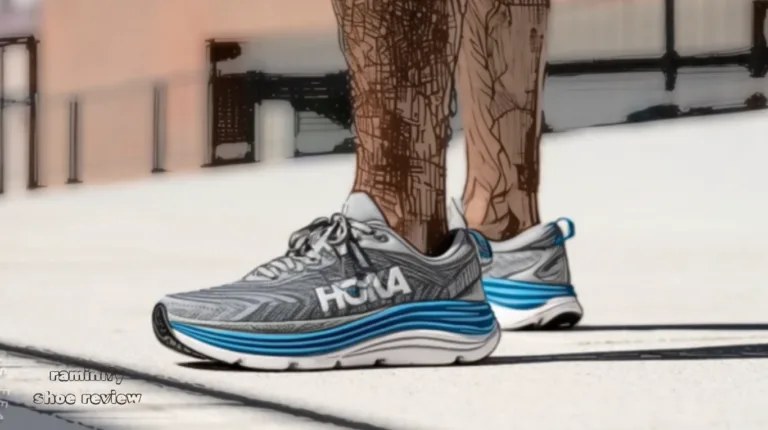
BOLG ⇨ SHOE REVIEWS Hoka Gaviota 5 Review Co-authored by Rio Jongsae KimLast Updated: nov 24,...
hoka clifton 9 review introduction image
Hoka Clifton 9 review
Our verdict The Clifton 8 gained a lot of popularity on TikTok, which motivated us to hoka clifton 9...
hoka bandi 8 review introduction image
Hoka Bondi 8 review
Our verdict Like other Hoka shoes, the Hoka Bondi 8 is an exceptionally comfortable shoe. You can easily...
Adidas Gazelle Green
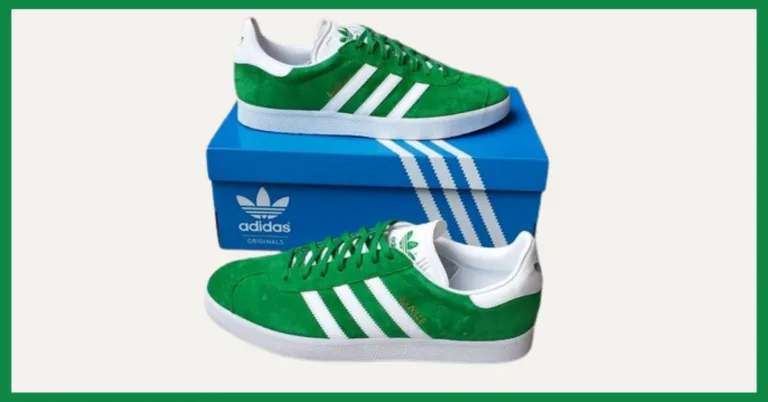
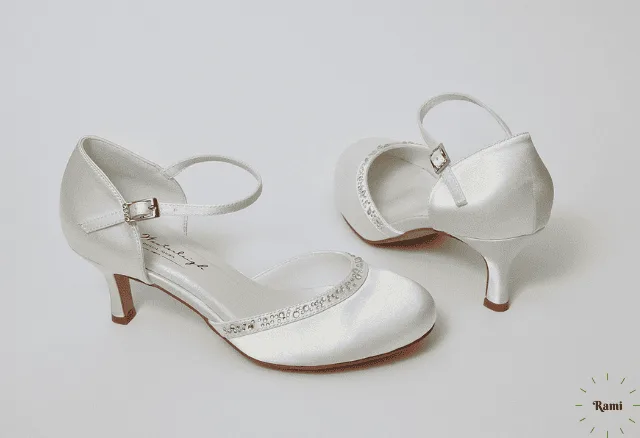
About of Adidas Gazelle Green From the 60s to today, Adidas Gazelle Green sneakers have maintained their...

BOLG ⇨ SHOE CARE

How to repair a shoe sole

Co-authored by Rio Jongsae Kim
Last Updated: Feb 25, 2025 ⊜References
Just because the first part of your shoe is worn out doesn’t mean the entire shoe is ruined. If the rest of the shoe is in good condition except for the sole, you can get your shoes back into shape within 24 hours. All you need is a few dollars’ worth of sandpaper and shoe sole glue. Let’s take a quick look at how to repair a shoe sole, replace it if it’s worn out, or how to fix a hole.

Reattaching a Loose Sole

WikiHow Image

1 Clean the loose dirt with water and rubbing alcohol. Clean the shoe and sole thoroughly with a cloth soaked in isopropyl alcohol and warm water. Pull the loose sole slightly to loosen it further—this will help the glue hold the shoe more firmly.

  • Unclean soles or shoes will lose their strength, so make sure to clean them thoroughly

how to repair a shoe sole
WikiHow Image

2 Apply shoe sole glue to both the shoe and the sole. . Use a toothpick or cotton swab to apply the glue evenly to the entire sole and shoe.
Some adhesives dry very quickly, sometimes within minutes. Follow the instructions on the adhesive product before using it. 

How to repair a shoe sole
WikiHow Image

3 Press the sole firmly against the shoe.. If you use too much glue, it may ooze out from the sides and stick to your hands or body. Don’t worry about excess glue—it can be sanded off later

How to repair a shoe sole
WikiHow Image

4 Hold the sole down with a rubber band or duct tape.. The shoe can take up to 24 hours to dry, so secure it with a rubber band or duct tape during this time. You can place a heavy weight on the glued area if needed.

How to repair a shoe sole
WikiHow Image

5 Leave it for 24 hours.. Keep the shoes in a cool, dry, and safe place for a full day. Make sure nothing, such as a pet, disturbs them while the glue dries. Leave the shoes for a full day—don’t rush to put them on.

How to repair a shoe sole
WikiHow Image

6 Remove any dried glue from the outside with 120-grit sandpaper.Once the glue is completely dry, use 120-grit sandpaper to rub away any excess glue that oozed out from the sides or stuck to different areas.

Replacing a Worn-Out Sole

how to repair a shoe sole
WikiHow Image

1 Remove the old sole. Use pliers to completely remove the sole that is starting to come loose. Press down on the loose part of the sole with the pliers, hold the shoe firmly with your other hand, and pull the sole off with the pliers. If the sole does not come off easily, use something hard (such as a paint scraper or butter knife) to hold the gap between the sole and the shoe while you pull the sole off with the pliers.

  • You can also use a heat gun or hair dryer between the sole and the shoe to soften the glue, making it easier to remove.

How to repair a shoe sole
WikiHow Image

2 Clean off the old glue.. After removing the sole, some old glue will remain on the shoe. Before applying new glue, clean off the old glue by rubbing it with a cloth soaked in acetone. You can use nail polish remover instead of acetone—just make sure to remove any loose dirt and old glue from the bottom of the shoe.

How to repair a shoe sole
WikiHow Image

3 Roughen the shoe and new sole with sandpaper. Take some 120-grit sandpaper and roughen the entire bottom of the shoe and the bottom of the new sole. Glue adheres better to a rough surface than to a smooth one.

https://raminify.com/how-to-repair-a-shoe-sole/
WikiHow Image

4 Apply the glue to the rough surface with a clean brush or cotton ball. Spread the glue evenly on both the new sole and the bottom of the shoe, paying special attention to the edges. If the edges are not glued properly, dirt and water can loosen the sole again, making your repair less durable.

  • Some glues require heat to dry, while others need a certain amount of time before they can be applied. Always read the instructions on the glue before using it.
  • If you need a reliable glue, consider Shoe Goo. It is available at sporting goods stores and department stores.

https://raminify.com/how-to-repair-a-shoe-sole/
WikiHow Image

5 Attach the sole to the shoe and press it firmly. Starting at the heel, gently place the sole on the shoe, ensuring that the edges of the shoe and the sole are properly aligned. Once everything is in place, press firmly to secure the sole to the shoe.

https://raminify.com/how-to-repair-a-shoe-sole/
WikiHow Image

6 Secure the sole to the shoe by wrapping it with a rubber band, duct tape, or regular tape. Be careful not to let the sole shift out of place.

  • Before wrapping the tape, place newspaper inside the shoe to help maintain its shape.
  • Let the glue set for a full day.

how to repair a shoe sole
WikiHow Image

7 . Leave the glue to work for a day. Leave the shoe in a safe, cool, dry place where it will not be disturbed for at least a day.

  • After it dries, remove the glue and sand it with 120-grit sandpaper.

How to fill shoe holes

how to repair a shoe sole
WikiHow Image

1 Clean the area around the hole. The first step in repairing a shoe is to clean it thoroughly. Clean the area around the hole and inside the hole itself. Use a cloth soaked in warm water and isopropyl alcohol, then let it dry for a few minutes.

how to repair a shoe sole
WikiHow Image

2 Roughen the edges of the hole with 120-grit sandpaper. To create a good bonding surface for the glue, rub the edges of the hole with 120-grit sandpaper until they have a rough texture.

how to repair a shoe sole
WikiHow Image

3 Remove the insole and tape over the hole. Place duct tape over the hole from the inside of the shoe. If the hole doesn’t go completely through the shoe, insert your finger into the hole and push it upward to locate it, then cover the area with duct tape.

Tip: If the insole of the shoe is not removable, push a small piece of paper into the hole instead.
how to repair a shoe sole
WikiHow Image

4 Fill the hole with glue. Gently pour the glue into the hole, ensuring it is completely filled. Don’t worry about excess glue—it can be wiped off later.

how to repair a shoe sole
WikiHow Image

5 Try to smooth the surface of the glue. Ice cube Smooth the surface of the glue with a tongue depressor or spoon covered with petroleum jelly.

  • ice cubes work well.

how to repair a shoe sole
WikiHow Image

6 Leave the shoe with the sole facing up. Leave the repaired shoe upside down in a well-ventilated area for at least a day.

  • You can also leave it under a fan.

how to repair a shoe sole
WikiHow Image

7 Remove any excess dried glue with 120-grit sandpaper. Remove any excess dried glue from the hole with 120-grit sandpaper. Check the entire shoe for any excess glue. Then use the sandpaper to rub the bottom of the sole until it is smooth.

Community Q&A
Question
What glue should I use to fill in and reattached a shoe sole?
Community Answer
To fill in and reattach a shoe sole, you can use the following types of glue:
Shoe Goo: This is a popular choice specifically designed for shoe repairs.
E6000: This industrial-strength adhesive is very effective for shoe repairs.
Contact Cement: This adhesive is great for bonding rubber and other materials.
Question
What should I check before I repair or replace my soles?
comment
Community Answer

You have to check to see if the soles have started to thin, or they have holes. You should also check both shoes to see if they’re wearing away evenly, or if they’re splitting from the upper side of the shoes. 

You may like

How to Wash On Cloud Running Shoes
How To Wash On Cloud Shoes
How to Clean Merrell Shoes
How To Clean Merrell Shoes
how to clean adidas shoes
How To Clean Adidas Shoes
clean shoes with a Toothbrush
Clean Shoes With A Toothbrush
How to Clean Shoes with Toothpaste
How To Clean Shoes With Toothpaste
how to clean satin shoes
How To Clean Satin Shoes

References

1.↑https://www.theguardian.com/lifeandstyle/2014/jun/09/how-to-mend-old-shoes 2.↑https://healthfully.com/remove-shoe-goo-6022674.html 3.↑https://www.theguardian.com/lifeandstyle/2014/jun/09/how-to-mend-old-shoes 4.↑https://www.youtube.com/watch?v=r3Stavmm_bM 5.↑https://www.youtube.com/watch?v=r3Stavmm_bM 6.↑https://www.theguardian.com/lifeandstyle/2014/jun/09/how-to-mend-old-shoes 7.↑https://www.youtube.com/watch?v=r3Stavmm_bM 8.↑https://www.ifixit.com/Guide/How+to+Repair+a+Hole+on+the+Shoe+Sole/50518

About This Article

Co-authored by:
Rio Jongsae Kim 
Designer Shoe & Bag Care Specialist 

Rio Jongsae Kim is a Designer Shoe and Bag Repair Specialist and the Owner of Kim’s Shoe & Bag Repair in Vancouver, BC, Canada. With over 40 years of experience, Rio and Kim’s Shoe & Bag Repair specialize in the repair and reconstruction of leather and luxury goods including shoes, handbags, and accessories. Rio’s experience and dedication to quality repair and restoration have led to his work being featured on Yahoo, Insider, and MSN.

Co-authors: 2
Updated: February 25, 2025